Simply, if you like to keep full control of your privacy in your web life, you can build your own private email server or SMTP server.
As we do not know how to set up our own email server, we don’t try it. If you want a solution of building your own email server with your personal domain, this detailed guideline will surely help you. Maybe, this is the only complete guideline with the step by step screenshot.
Unlike Gmail, Yahoo, Microsoft (Hotmail, Outlook), or Apple, you can set up a private email server environment. It will reduce the cost of business email. Similarly, the process will help you to access, store or manage it in your own space. It will reduce hassle and you can manage the server at your own space.
According to the operating system including Windows, or Linux, the process may vary. Let’s talk in detail.
Why do you need your Own Email Server?
If you ask me, why do you need your own email server? What will you answer?
Generally, there are many reasons. First, I will tell you, the private email server ensures the highest privacy. As you run the server private, no one has access to the server. For this reason, we tell, it is more secure. The experts love to use it as outstanding. Outgoing or incoming, you are the only owner who can access the server. You have full control of your email server. It has no chance of getting ads on the screen, no spam unwanted spam mail as well. At the same time, the private mail server is reliable. You run the server in your own cloud server.
So, again, it ensures great uptime and can be maintained easily.
Advantages and Disadvantages of Own Email Server:
As discussed above, you have learned the advantages of setting up your own email server. It provides the highest privacy, which is more secure and reliable. No authorities can control your email inbox.
There are some cons alongside the pros on the private email server.
First of all, Gmail, Microsoft, or Yahoo maintains the server taking the support of the experts. But you have no control here. It is true; they are using the highest security. Sometimes it may be vulnerable too. Hackers may control if you are not more techy. Even Malware may take control of your server.
As like the most renowned companies, your email server can also be vulnerable. You are not using experts as well.
I know most of the bloggers will not share the disadvantages of a private email server. But I think you need to know this.
Surely, it will help you to take the necessary steps which will remove the cons.
That means you can certainly set up your own email server to reduce the cost as well as getting other facilities.
Prerequisites To Set Up Email Server:
Before going to set up the server, we need to know the prerequisites. Maybe you know, but to keep the step, I will point out here.
- A Dedicated Server or Cloud Server that will work as an email server with sufficient hard-drive capacity.
- A domain name according to your email server.
- High-speed, secure Internet connection.
- A specific operating system. For example, Windows or Linux.
- Spam-Filtered And Virus Protection Software
The mentioned step is required. If you need anything more will get among the descriptions.
How To Set Up Your Own Email Server?
My intention of this tutorial is to help you to set up the email server freely on your own Dedicated or Cloud server without any help from others.
If you think you are not confident enough, you may take support from any experts. Even you can contact us for detailed support. No matter which parts of the world you are staying in. Our team is experienced in handling remotely.
First of all, we make the guideline based on Windows Operating System. If you use Linux, no matter continue the tutorial or inform us to get the right one for you.
As we use Windows, we will use hMailServer. It is one of the most popular, reliable, secure and open-source software. So, setting up free with a reliable one hMailServer is perfect. I also suggest it. It helps to protect from malware and spam emails. It has some built-in filtering processes, including SpamAssassin.
Now, let’s see the complete setup process of hMailServer on your own Server to create an email server. I have used a screenshot of all the steps. Surely, it will help you to do the steps confidently.
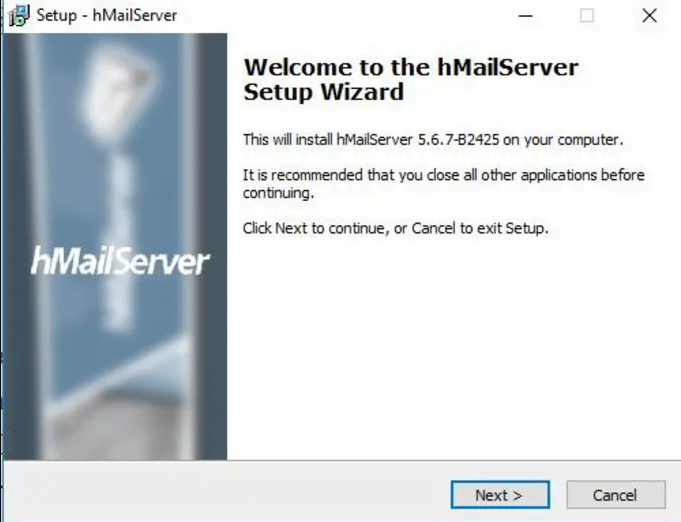
- First, download the installer from the hMailServer website.
- Double click to run the installer file and click on Next.
- Now accept the terms and policy and click on Next.

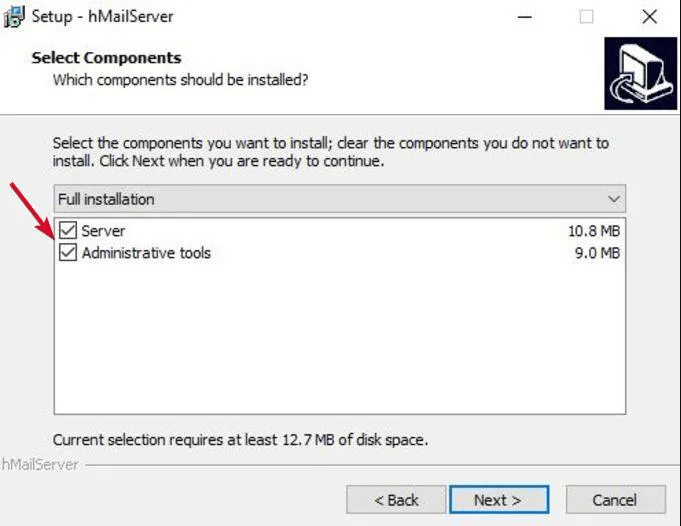
- In the next window, checked on the server option to activate the server on the local computer. Similarly, I checked on the administrative tools to actively maintaining the server on the remote computer.
- Now check the database server type. By default, it will take a built-in database engine, which Microsoft SQL compact. It is perfect and ready to use. If you want, you can use an external database as well. By selecting the option built-in database, Click on Next.

- In this window, select the destination location where should hMailServer be installed. And click on Next.

- Now, select the password by which you will maintain the server. Keep it easy to remember or write it down anywhere you will get easily.
- Click Next to install the hMailServer on your Server now.
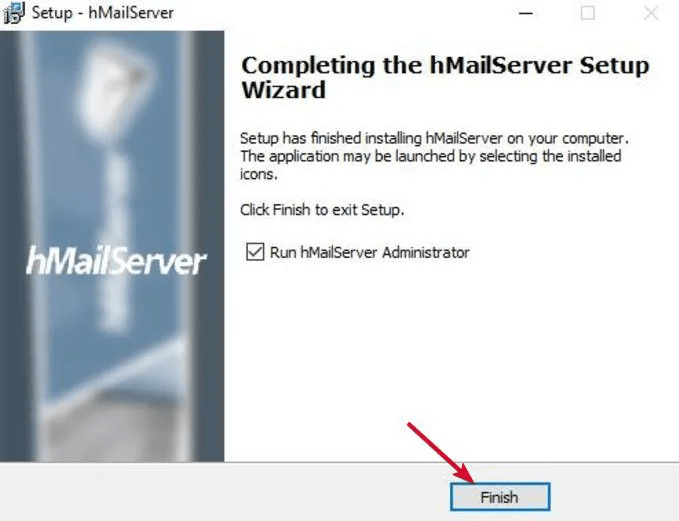
- When the installation is complete, a successful window will come. From here, checking the run now checkbox (Run hMailServer Administrator), click on Finish.
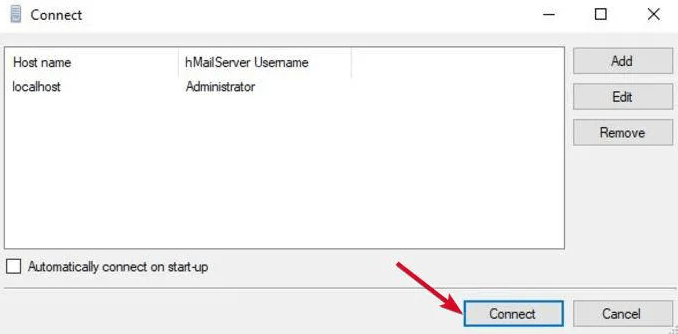
- It will open the admin window of hMailServer. Click on Connect.
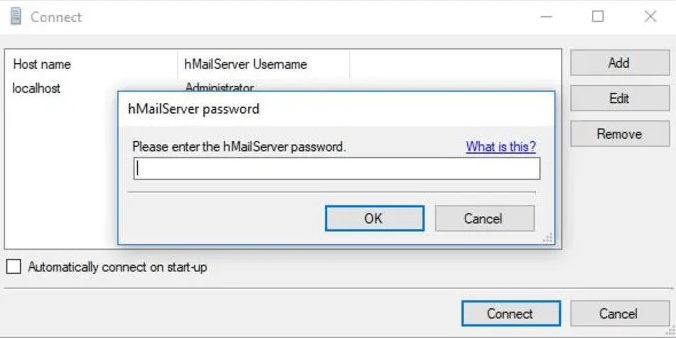
- Now Give the password you entered at the time of installation.
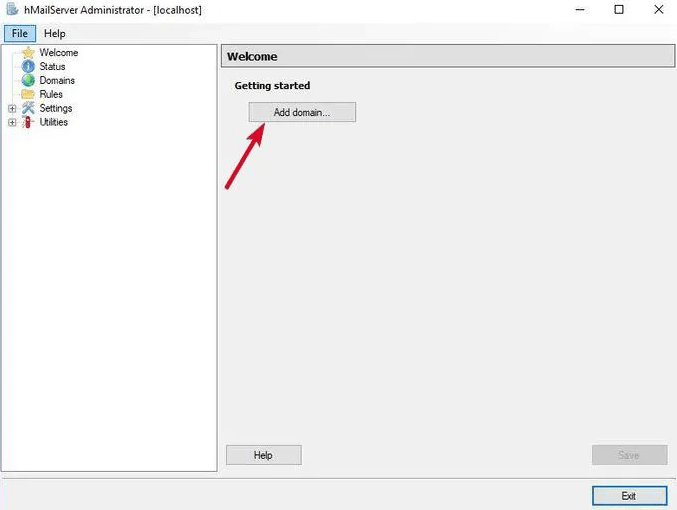
- In this window, you can add a new domain to configure the SMTP server.
- Here you will find some tab. From the first tab (General), you have to provide the domain name and click Save.

- From the left menu side, click on Accounts, which is under Domains. Please check the screenshot.

- Click on Add to add new email. Give a new email address, name and password. Click on Save.

- Go to Protocols Options from the Settings menu. Choose the SMTP and uncheck the boxes named with POP and IMAP.
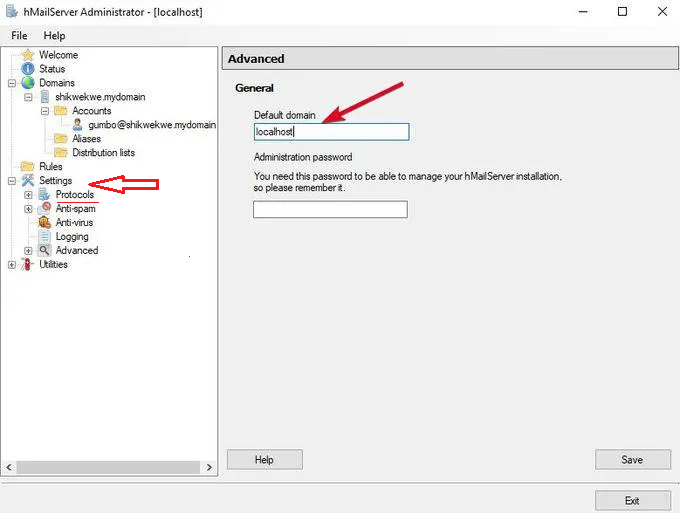
- Now click on the Advanced tab. From default domain write localhost and click on Save.
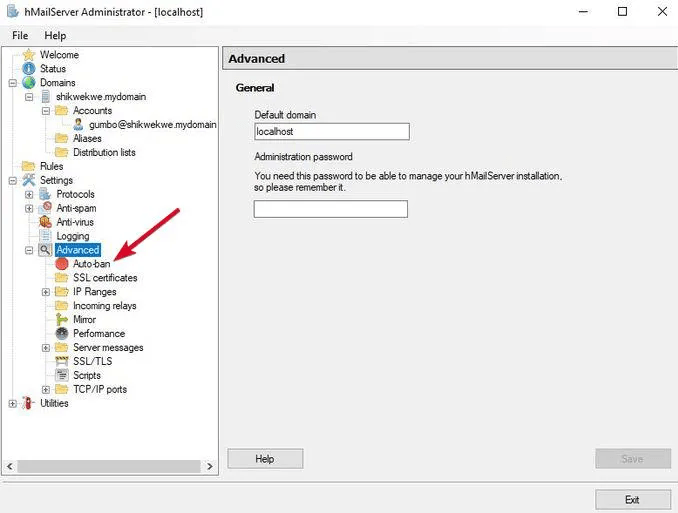
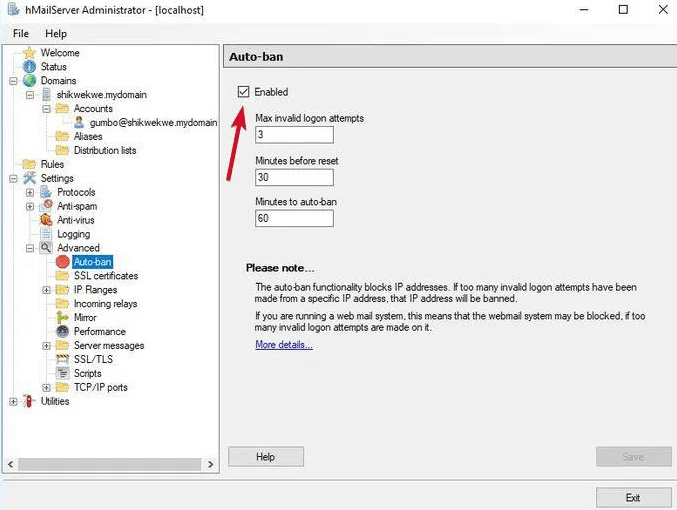
- Expand the Advanced tab now. You will see Auto Ban. This feature will block the failed login attempts with IP addresses.
- To stop the feature, uncheck the box Enabled. Don’t forget to save it.
- To configure SMTP, IMAP and POP, click the IP Ranges tab, also click on TCP and IP Ranges tab. It would be something like that—SMTP and POP with 25 and 110, IMAP with 143. When you open by configuring the ports, it will be enabled to receive and send the mail.
- To enrich the functionalities, enable some additional features, including forwarding, auto-reply, DNS blacklists and others.
- At last, expand the utility tab. You will see the Diagnostics tab. From here, you can easily test the configuration that you have set. Check it carefully.
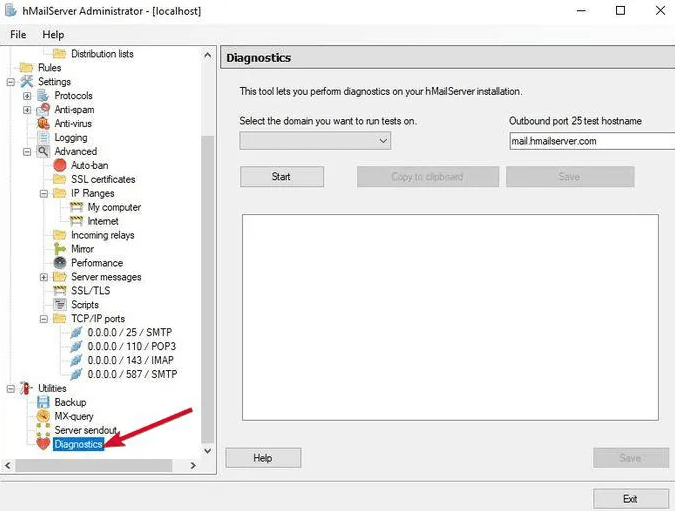
- To test the configuration and feature, you have to choose the domain first under the Diagnostics window. Then Start the test.
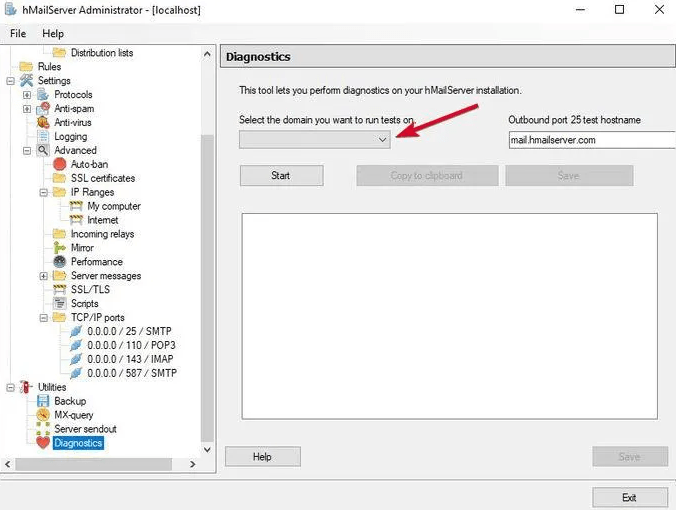
- ***Thus, you can test the basic configuration of your email server.
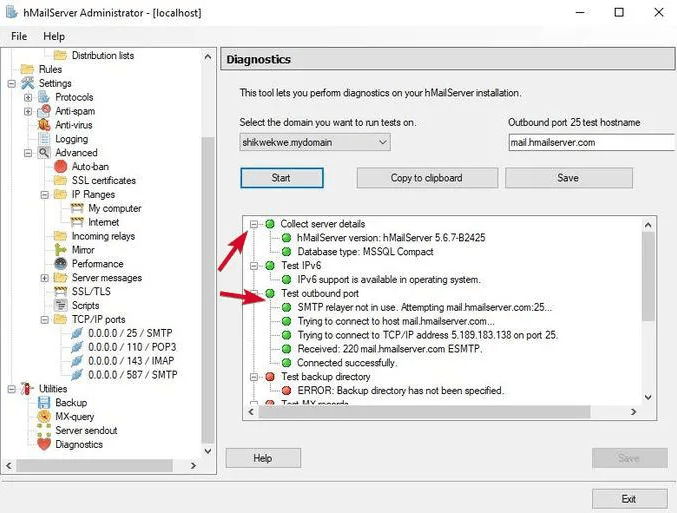
- You will collect server details from here. You can check all types of version or database info.
- From the Test outbound port, you will see how the server will work. Anything errors here mean, your server is unable to communicate with the SMTP server.
Finally, you have successfully set up your own email server freely.
To Sum It Up:
Now you can send or accept email from anywhere without any hassles. To make it comfortable, you may use some popular email applications in your PC—for example, Windows Mail Outlook Application, or Thunderbird from Firefox. You can easily set up with the username and password.
For the first time, it may seem like taking more effort. Although if you do it accordingly following the steps, it would be secure, hassle-free, as well as reliable. If you are looking for other cloud webmail options, surely, you can contact with Speed Host Team.
Sometimes you may need to set up A records, CNAME records and MX records to launch it with some mail application. You will get the options from the Settings menu. If you need support or if any questions, comment for further queries. Thanks a lot for checking our blog to get the latest tech tips from Speed Host.