What is Image Optimization?
Image optimization simply means reducing the file size of the image without compromising its quality. You can reduce the file size by either cropping the image or decreasing the image size. Or, if possible, you can do both to get a more optimized image. We will see within a few minutes how to do this. But first, we want to know why we need to optimize images.
Why do I need to Optimize Images?
In today’s modern world, everyone loves images. An image can tell a better story than a piece of writing. This is why everyone likes to fill their website with tons of images. Important to realize that by doing this, you are making your website heavy. Now by saying “heavy,” means the browser will take a lot of time to load the page. And visitors certainly don’t like the webpage that performs slowly. So, most of them will leave your site. Hence, it will increase your bounce rate. Research tells that 40% of the visitors tend to leave a site if it doesn’t load within 3 seconds!
So, to get out of this situation, you just need to optimize images. A study shows that more than 64% of your website content is images. So, if you can optimize these images, your website will definitely perform better.
How to Optimize Images?
Well, there are many ways to optimize your images. But if you use Photoshop, you can do it within a few seconds! Yes, it’s that simple! We will try to show a step-by-step process to help you fix your headache.
First thing, first! You need to install Photoshop CS6. We recommend you install CS6 because any user with any PC can run it smoothly.
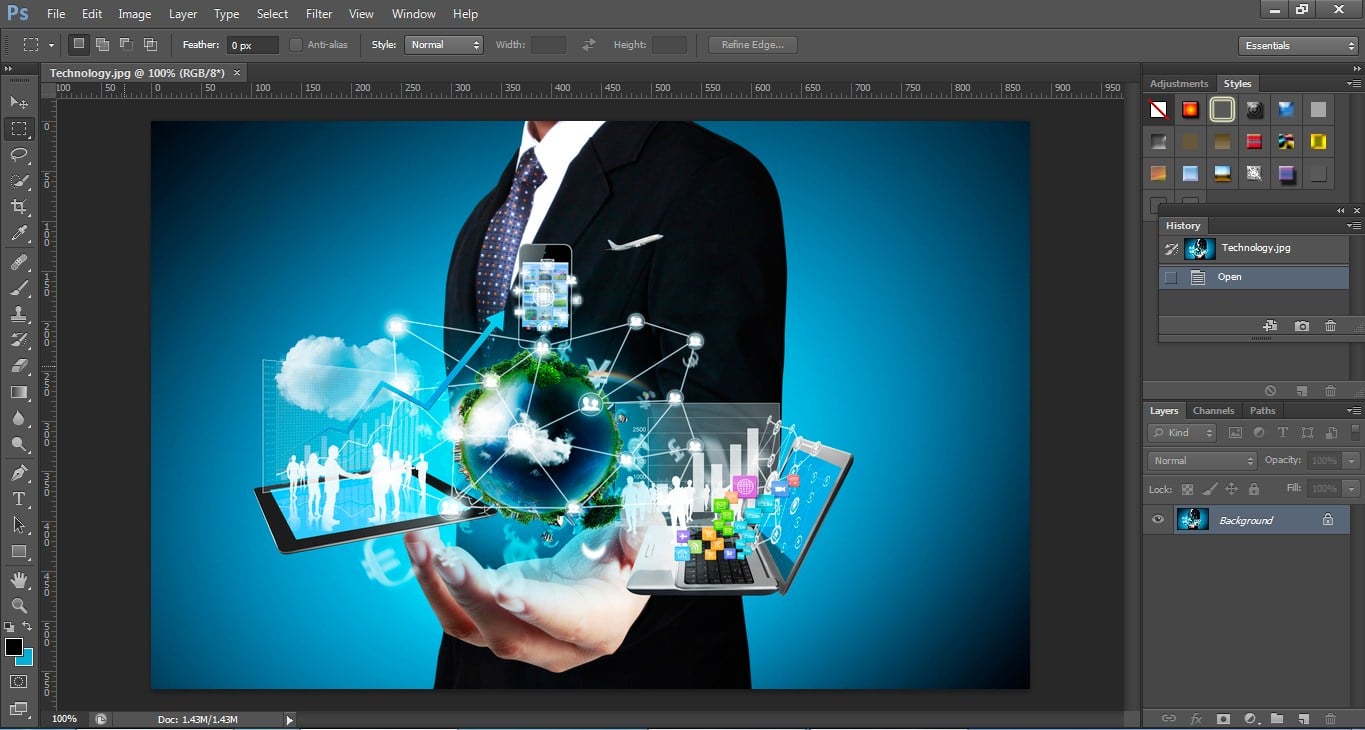
Now about the Images! Before uploading to your website, you have to optimize it first one-by-one. So, after installing Photoshop on your machine, select your first picture. Right-click on it and open it with Photoshop.
After opening, your window will look like this:
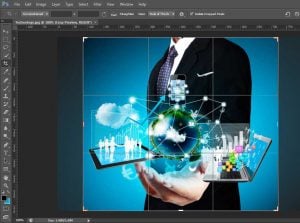
Then, the first thing you should do is crop the picture. Basically, we do this when we see there is an unnecessary area around the subject of the image. You may not need to crop depending on your image. That’s absolutely fine. But if you still find a way to crop at least a little bit, your image size will decrease naturally. Find the ‘Crop Tool’ on the Tool Panel at the left-hand side.

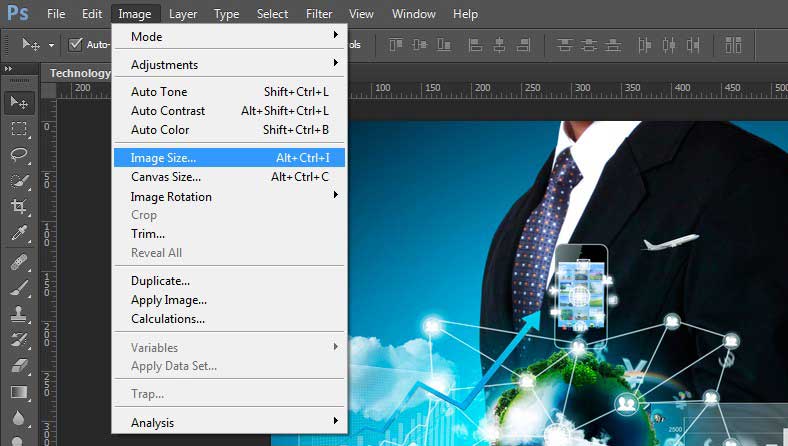
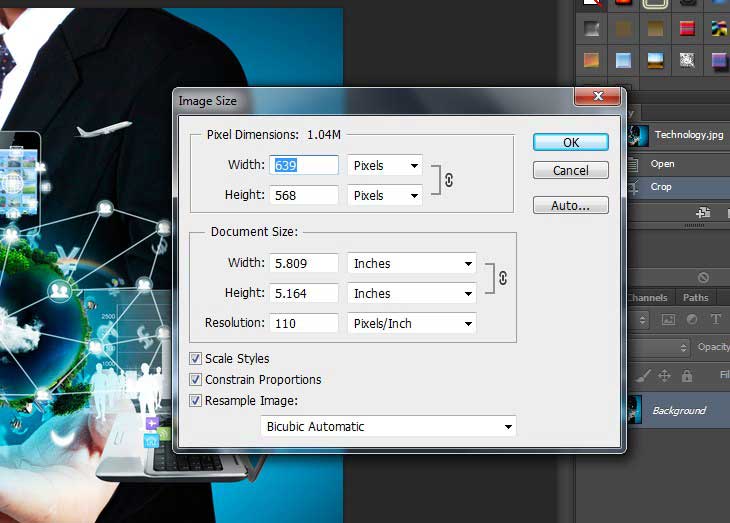
After cropping, we must need to change the dimension (height and width) of the image. Set your exact requirement. Webpages generally resize the images to fit in the window, but still, the file size remains too big. So, in order to relax your page, you have to minimize the file size. One of the ways of doing that is to lessen the image dimension. Click on the ‘Image” tab at the top bar and then go to Image Size. This will bring a new window where you can resize your image. Note that, you can manually change either the height or width and the other will change automatically. Hit ‘OK’ to save the change.
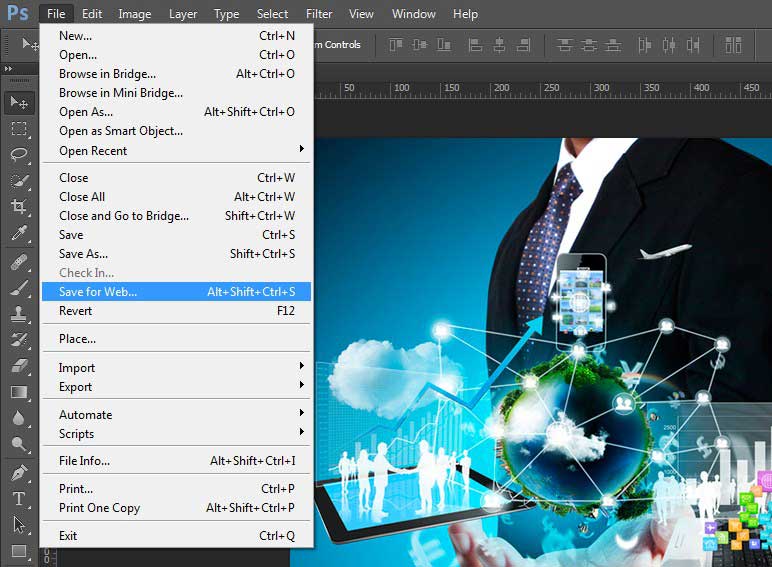
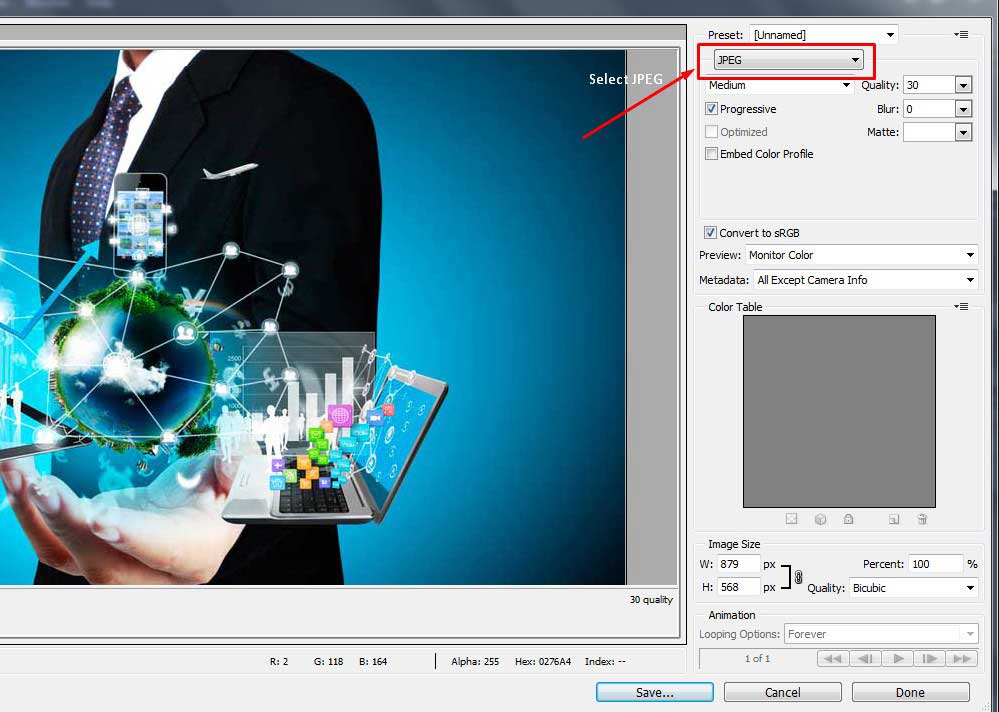
Now, as you have resized your image, it’s time to Save it. But we will save in a different way. Go to ‘File’ at the top bar and then click on ‘Save for Web. It will bring another window. Now, select the image category as ‘JPEG’ and save it at the location in your PC where you want to. That’s it! You finally have optimized your image. You will see a drastic change in the file size after comparing it with the original image size. Now do the same for the other pictures as well.
Bonus Tip
After doing all of these, for more optimization, you can use LiteSpeed Cache if you have a WordPress Site. Just go to ‘Plugins’, then ‘Add New’ and then search ‘Litespeed cache’ on the search bar. Install and Activate! You can also download this plugin from here. After activating, you can see the ‘LiteSpeed Cache’ menu on the left side of your WordPress admin panel. Click on it and go to ‘Image Optimization.’ Finally, by clicking ‘Optimize,’ all the images of your website will be processed and optimized.

Note that this is a Premium Plugin!
But customers who use our Hosting Service will get this plugin by default. And also for FREE! Because we have bought LiteSpeed Cache and installed it in our server for our customers.