In this knowledgebase article of cPanel, we will see how to configure MX records for Google Workspace, formerly gsuite or Google Apps. It means you can use Google Workspace while using cPanel for hosting of your website. You just need to configure MX records according to Google Workspace.
Need to mention, Google Workspace is popularly familiar for custom email (e.g. you@yourdomain.com) based service or webmail. The service offers email, drive, calendar, docs, sheet, meet, forms, etc. If you need domain based email and related service, now Google Workspace is the best solution for you. It was formerly known as gsuite or Google apps. To use Google Workspace, you need to subscribe Workspace first. That means you have to open a Google Workspace account.
With SpeedHost shared hosting, you can easily add Google Workspace with one click. We have dedicated support for configuring Workspace as well. If you use dedicated or VPS hosting of SpeedHost and do not see Google Workspace on cPanel, contact with us with live support.
How can I Configure Google MX records on cPanel
Quicks Steps
- Sign up for a G Suite account And Verify The Domain
- Login To cPanel
- Add MX Record With Priority And Destination
- Delete Default Record (if Any)
- Configure Email Routing
- Completion
See also: how to set up email forwarding in cPanel.

Let’s check the steps in details—
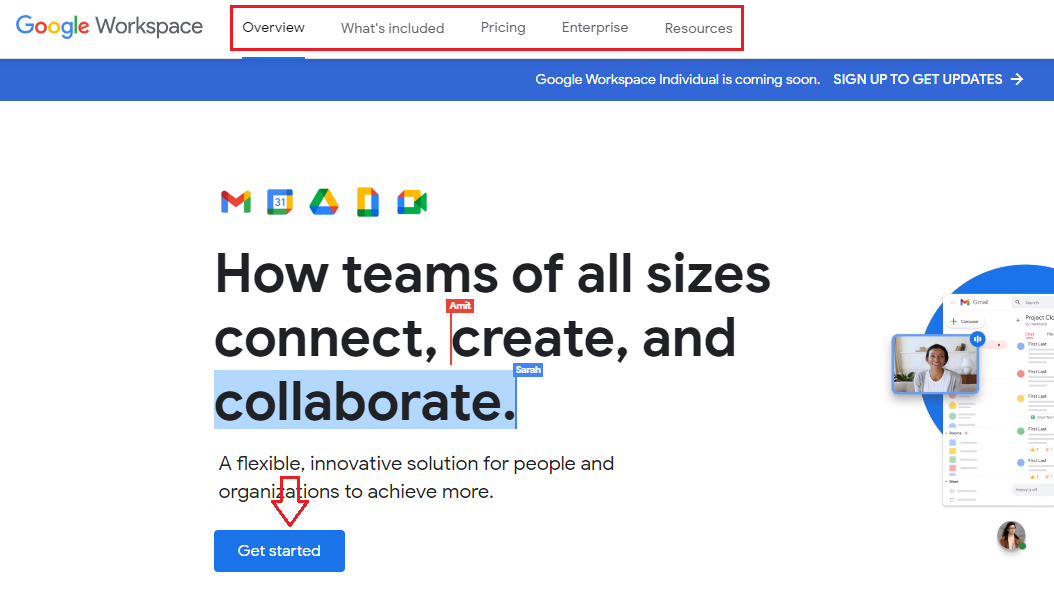
Sign up for a G Google Workspace account
First you need to create a Google Workspace account from here. When you are setting up an account to Workspace, provide the domain name you want to use as business email and bought from SpeedHost.
If you do it accurately, you will get an email for further instructions. Click on it. It will bring you on Google Admin Console.
When you click on Start Setup, you have to verify the domain you use. Now, click on Begin Verification, you have to complete the below methods for verification.
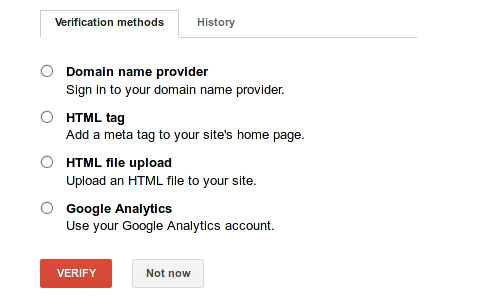
When you complete the steps, you will get the confirmation message about the verification.

Hope you have done it properly. If you face any issues, contact our support teams. Now, you have to configure cPanel to edit MX records.
- Check more about how to set up Google SMTP server without any cost.
Google MX Records
The MX records you’ll add are the following—
| Name/Host/Alias | Time to Live (TTL*) | Record Type | Priority | Value/Answer/Destination |
| @ or leave blank | 3600 | MX | 1 | ASPMX.L.GOOGLE.COM. |
| @ or leave blank | 3600 | MX | 5 | ALT1.ASPMX.L.GOOGLE.COM. |
| @ or leave blank | 3600 | MX | 5 | ALT2.ASPMX.L.GOOGLE.COM. |
| @ or leave blank | 3600 | MX | 10 | ALT3.ASPMX.L.GOOGLE.COM. |
| @ or leave blank | 3600 | MX | 10 | ALT4.ASPMX.L.GOOGLE.COM. |
How to set up Google MX Wizard within the cPanel For Workspace
First login to cPanel with the username and password. (you will find it here example.com/cpanel)
Now go to Domains section, you will find Zone editor here. When you will click Zone Editor, it will take you DNS configuration page. Here, you will see all the listed domain you have added. Click on Manage which one you want to edit the MX records. You will also see here A Record, CNAME Record and, MX Record.

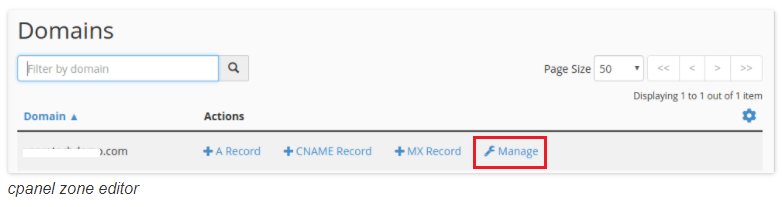
From Add Record, you will find all types of Record you can add. Just click on Add MX Record from here.

When you click on Add Record with MX Record, you will get the options for adding MX Record with Priority, and Destination option.

Now click on Add Record to save the record. You will get success message as like below.

| Priority | Destination |
|---|---|
| 1 | ASPMX.L.GOOGLE.COM |
| 5 | ALT1.ASPMX.L.GOOGLE.COM |
| 5 | ALT2.ASPMX.L.GOOGLE.COM |
| 10 | ASPMX2.GOOGLEMAIL.COM |
| 10 | ASPMX3.GOOGLEMAIL.COM |
Add the above all record from Google one by one.
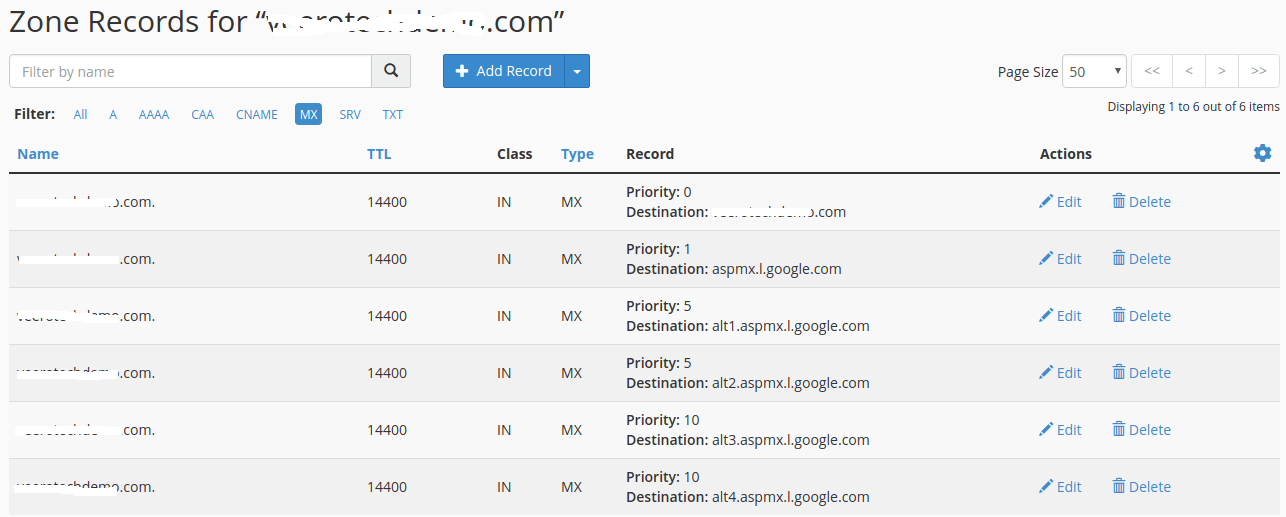
When you add the all record, it would be something like the below screenshot.
Now Delete Any Default Record, if you have.
Now you have to delete default record if you have any. Click on MX record option, and if you see any record rather than Google Workspace record mentioned above, click on to delete it.

Caution: Never delete any Record of Google Workspace. It may fail any service of Workspace then. So, do it carefully.
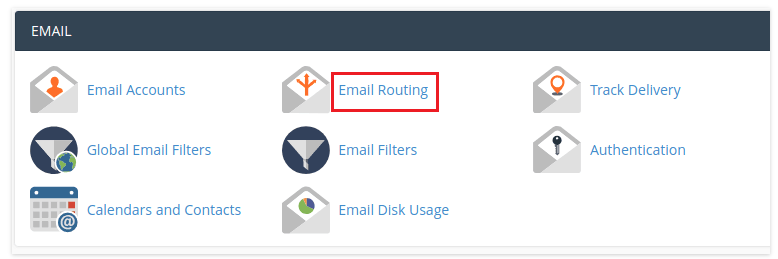
Configure Email Routing:
Now, we are in the last steps. It is necessary to configure Email Routing. For doing this, you have to go to Email Routing option under Email on cPanel.
By default it stays as Automatically Detect Configuration, we suggest to do it as Remote Mail Exchanger. For doing this click on change selecting “Remote Mail Exchanger.”

Yes!
You have done all the steps to set up Google Workspace with cPanel. It may take 48 hours to activate the account and happening the changes. To test the changes, you may send email from your business-based email if you create it already.
If you need fast hosting that supports cPanel, click on here. Similarly, if you face any issues, contact our support team.
Check how to enrich 100% of cPanel security within minutes.
Conclusion
Today we have learnt what is Google Workspace, how do you edit MX Records and how do you open business email with Google Workspace and cPanel? I hope you understand how to edit MX record and how to exchange email. If you like the article written about Server in SpeedHost, you may share the article to help others. Also, if you have any questions or suggestions related to the article, please let us know in the comments below. Don’t forget to check some related article from our blog and knowledgebases.